Common Signs of a Faulty Irrigation Valve (How to Identify)
Are you struggling to identify the common signs of a faulty irrigation valve? At Matehuala Landscape And Irrigation, we understand how essential it is to keep your irrigation system running smoothly, and the valve plays a crucial role in this. Our team, serving areas like Celina, Frisco, and McKinney, is committed to helping you spot these issues before they become major headaches.
In this article, we’ll explore the symptoms of faulty irrigation valves and delve into effective testing and troubleshooting methods. Whether you’re a DIY enthusiast or prefer expert assistance, you’ll find valuable insights to help keep your landscape lush and thriving. Join us in unearthing the secrets to maintaining a perfect irrigation system!
What Are the Common Symptoms of a Faulty Irrigation Valve?
Recognizing the signs of a faulty irrigation valve early can save you time, money, and the hassle of dealing with more significant issues later. An irrigation valve—critical for regulating water flow in your irrigation system—may show various symptoms when it’s not functioning correctly.
One of the most obvious signs of a faulty valve is inconsistent water pressure. If you notice your sprinklers are either barely trickling or gushing water everywhere, it could be a valve issue. This inconsistency can lead to uneven watering, affecting your lawn or garden’s health.
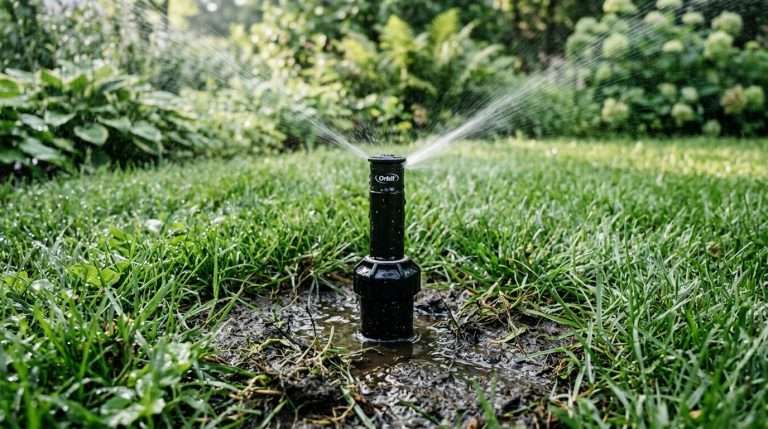
Leaks are another common symptom. You might observe water pooling near the valve or hear water hissing even when the system is off. This not only wastes water but can also cause damage to your landscape over time.
Strange noises coming from the valve, such as humming or vibrating sounds, can indicate that something is amiss. These sounds suggest that the diaphragm inside the valve might be worn out or damaged.
Finally, if your irrigation zones are not turning on or off as they should, a faulty valve could be the culprit. This happens when the valve isn’t opening or closing properly, often due to electrical issues or physical obstructions.
By keeping an eye out for these symptoms, you can address valve issues promptly, ensuring your irrigation system operates smoothly and efficiently.
How Can I Test My Irrigation Valve for Faults?
Diagnosing issues with an irrigation valve isn’t always straightforward, but testing it is a necessary first step. You’ll want to pinpoint whether the valve is the root of your watering woes before moving on to other potential issues.
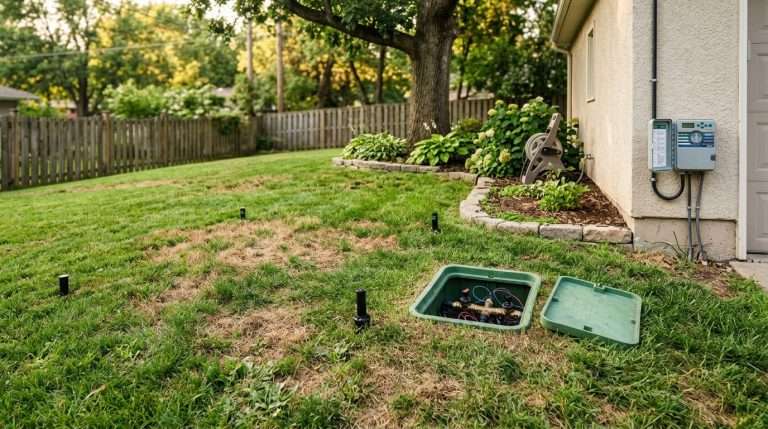
Fortunately, with a few simple steps, you can test your irrigation valve to confirm if it’s functioning properly or if it’s the cause of those dry patches in your yard.
- Listen for Unusual Sounds: When the valve opens or closes, listen for odd noises like humming or screeching—these are often indicators of a faulty valve.
- Check for Water Flow: Open the valve manually and observe water flow through the system. Weak or inconsistent water flow may suggest valve problems.
- Inspect for Leaks: Look around the valve for signs of leaks or water accumulation. Even a small drip can indicate a sealing issue.
- Test with a Multimeter: If you suspect electrical issues, use a multimeter to test the solenoid for proper voltage and continuity.
- Evaluate the System’s Response: Activate the valve via your control system and observe if it responds quickly and shuts off cleanly.
- Manual Operation: Use the manual override to operate the valve, which can help determine if the problem is electrical or mechanical.
After conducting these tests, you’ll have a clearer picture of your valve’s health, pointing you in the right direction for troubleshooting or repair.
What Tools are Necessary for Checking Irrigation Valve Issues?
Detecting and fixing issues with your irrigation valve can require some specific tools. Having the right tools on hand can simplify the troubleshooting process and help you address any problems effectively (and quickly!). Here’s what you’ll need:
- Multimeter: Essential for checking electrical connections and ensuring that voltage and current levels are correct.
- Screwdriver Set: Useful for opening valve boxes and accessing internal components; a variety of sizes can be helpful.
- Pliers: Handy for gripping small parts and maneuvering wires or tubing within tight spaces.
- Wrench: Necessary for loosening and tightening nuts and bolts that secure the valve or other components.
- Wire Stripper: Required for safely removing insulation from wires during testing or replacement tasks.
- Flashlight: A good light source is key when working in dimly lit valve boxes or checking underground systems.
- Leak Detector Fluid: Helps identify small leaks or escaping air pressure in valve components.
Having these tools available can make diagnosing and fixing irrigation valve problems much smoother. Up next, we’ll explore how to troubleshoot common irrigation valve problems.
How Do I Troubleshoot Common Irrigation Valve Problems?
Irrigation systems help keep your landscape lush and green, but even a small issue can disrupt their efficiency. Troubleshooting common valve problems is essential for smooth operation.
Identifying Electrical Issues
If valves aren’t responding, electrical malfunctions might be the cause. Check the wiring connections and look for any visible signs of damage or corrosion. Ensure the valve solenoid is receiving power by using a multimeter.
If electrical issues persist, compare the voltage at the controller and the valve to spot inconsistencies.
Detecting Obstructions or Blockages
Debris can block the valve, restricting water flow. Inspect the valve for any accumulation of dirt or debris. Remove the valve top to check the diaphragm or any internal components for obstructions.
Cleaning out the valve may restore adequate flow and prevent further complications.
Addressing Leaks and Water Pressure Problems
Leaks might be due to a misaligned diaphragm. Replacing or realigning it can fix the issue. Also, check if the gasket is intact and seated properly.
Low water pressure can result from a malfunctioning valve or clogging. Ensure the valve is fully open and free from blockages.
Evaluating Controller Settings
Incorrect scheduling or settings in the controller may lead to erratic valve performance. Double-check the controller settings for each zone, ensuring they match your irrigation needs.
Resetting the controller to its default settings can resolve any programming errors.
Troubleshooting these common issues helps maintain the efficiency and effectiveness of your irrigation system. Regular inspections and maintenance can prevent many valve problems before they develop into costly repairs. Up next, we’ll discuss when it’s time to replace an irrigation valve and how to make that decision.
When Should I Replace an Irrigation Valve?
Irrigation systems are vital for maintaining lush landscapes and healthy gardens. But like any mechanical component, valves within these systems can wear out or malfunction. Recognizing WHEN to replace a faulty irrigation valve helps prevent water wastage and ensures efficient watering.
Here are some clear signs that it’s time to replace your irrigation valve:
- Persistent Leaks: If your valve continuously leaks, even after attempted repairs, it’s likely time to replace it. Leaky valves can lead to water loss and increased utility bills.
- Inconsistent Watering: A valve that fails to open or close properly can result in uneven water distribution, leaving some areas parched and others waterlogged.
- Excessive Noise: Unusual hissing or hammering noises often indicate that a valve is struggling to function correctly and may need replacement.
- Age of the Valve: If your valve is over 10 years old and exhibiting problems, replacement is often more cost-effective than continuous repairs.
- Corrosion or Physical Damage: Visible signs of wear, such as corrosion or cracking, are strong indicators that replacement is necessary to avoid further malfunction.
Timely replacement of irrigation valves ensures optimal performance and extends the life of your entire irrigation system. Keeping vigilant for these signs will help you maintain an efficient watering schedule, saving you both water and money in the long run.
What Are the Costs Associated with Repairing or Replacing an Irrigation Valve?
When dealing with irrigation valve issues, understanding the potential costs involved can help you make informed decisions—whether you opt for repair or replacement. Several factors influence these costs, including the type of valve, the complexity of the problem, and whether you choose to DIY or hire professionals.
Repair Costs
Repairing an irrigation valve might be a cost-effective solution, depending on the problem. Minor issues, like cleaning out clogs or replacing small parts, typically incur lower expenses. However, severe damage may require more extensive work, driving up costs.
- Labor costs: Hiring a professional will usually cost between $50 and $100 per hour.
- Parts replacement: Prices for small components, like O-rings or solenoids, typically range from $2 to $20.
Replacement Costs
In some cases, replacing the valve is the best option—especially if it’s outdated or extensively damaged. While upfront costs are higher than repairs, a new valve might offer better performance and longevity.
- Valve cost: New irrigation valves can range from $15 to $100, depending on the brand and specifications.
- Installation costs: Professional installation usually adds $75 to $125 to the total bill.
DIY vs. Professional Services
Attempting a DIY repair or replacement can save on labor costs. However, it carries risks if you lack the necessary skills or tools. Hiring professionals ensures expertise, often resulting in a quicker and more reliable solution.
Balancing cost with expertise ensures your irrigation system functions efficiently without unnecessary expenses. Carefully evaluate your situation and consult with professionals to choose the most cost-effective solution for your needs.
Conclusion
Identifying a faulty irrigation valve early is crucial in maintaining a healthy and efficient irrigation system. Common signs such as leaking, weak water flow, or zones not turning on or off can indicate issues that need immediate attention to prevent further damage to your landscape. Addressing these problems promptly will ensure your lawn and garden receive the right amount of water, saving you time and resources in the long run.
If you’re experiencing any of these signs with your irrigation system in Celina, Frisco, Little Elm, or nearby areas, Matehuala Landscape And Irrigation is here to help. Our team specializes in irrigation repair and installation, along with a range of other landscaping services, ensuring your outdoor space looks its best. Contact David Matehuala for expert assistance at 214-317-6816 or dmatehuala@aol.com. Let us handle your irrigation needs with professionalism and care.